How to do it
How to create a shape path using free tools. The first step is to find an image that you want to make a shape out of. Images that have simple backgrounds are much easier to use than images with complex backgrounds, because essentially you want to generate a two color image which you will trace to get the shape path.
Here is an example of a "easy" to use shape
original image from internet
Here I want to make a shape of the batman logo. Its relatively easy to remove the outer oval and yellow color in a paint program by selecting similar colors. Selecting similar colors does not work well when the background is complicated with lots of the color that you are trying to select.
You can use GIMP or PhotoFiltre or your favorite image editing program. I use PhotoFiltre, you select the unwanted colors (using the magic wand tool with a tolerance of 30 (you may need to tweak the tolerance)) and delete them. This gives you the following picture:
You can use GIMP or PhotoFiltre or your favorite image editing program. I use PhotoFiltre, you select the unwanted colors (using the magic wand tool with a tolerance of 30 (you may need to tweak the tolerance)) and delete them. This gives you the following picture:
image with background removed
There are some narrow artifact ovals, but they do not appear to affect the generation of the shape when using Inkscape. Save this image in a lossless format, such as png. Load the image into inkscape and select it. Then use the "Path", "Trace Bitmap" to generate a path. Select the original bitmap and delete it. This leaves you with a path/shape for the batman logo. In inkscape, if you select your object and the "Edit paths by nodes" tool, the path/shape will become visible.
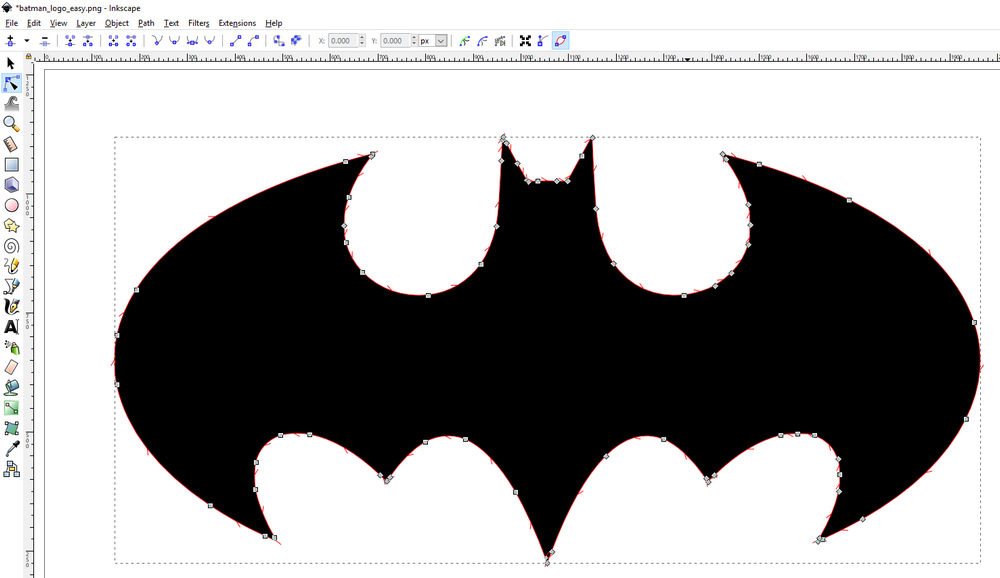
shape/path from Inkscape
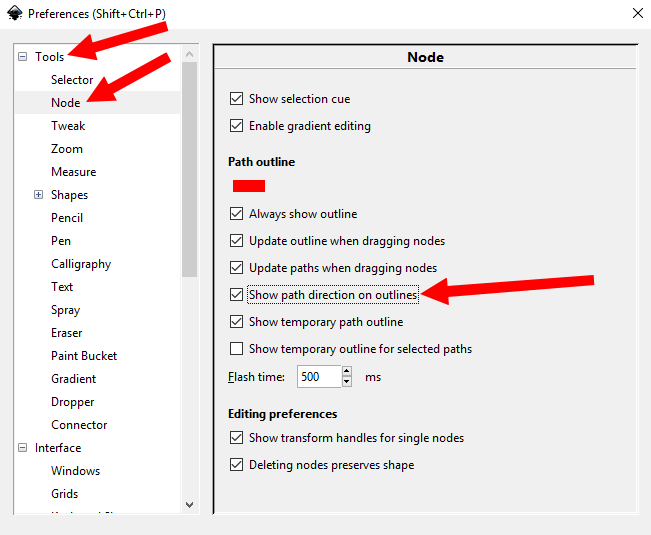
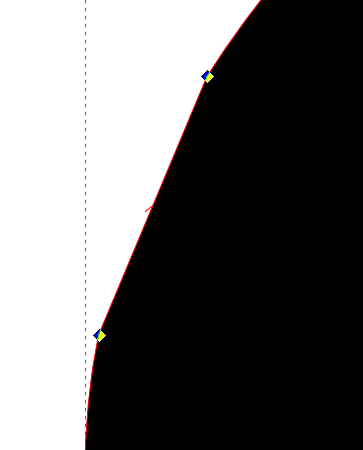
If you don't see the little arrows, which indicate the direction of the path, you will need to enable them. In inkscape under the "Edit", "Preferences" menu, navigate to "tools" and set the following check box:
How to show path direction
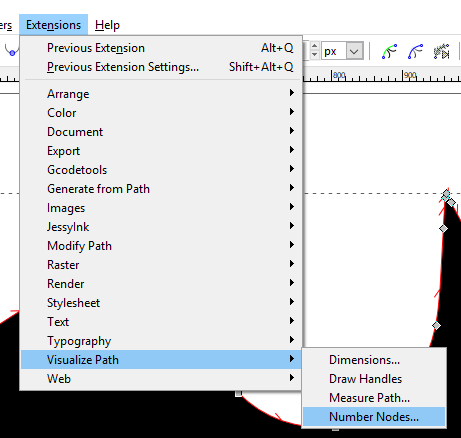
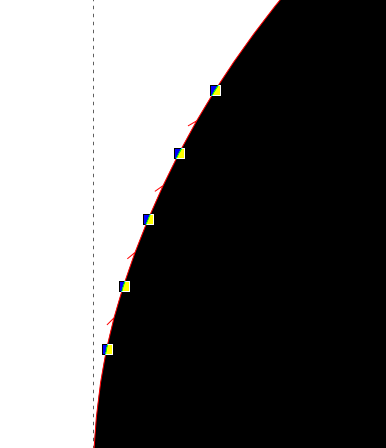
To see how the nodes of the shape are numbered. On the toolbar, select "Extensions", "Visualize Path", "Numbered Nodes"
How to display node numbers
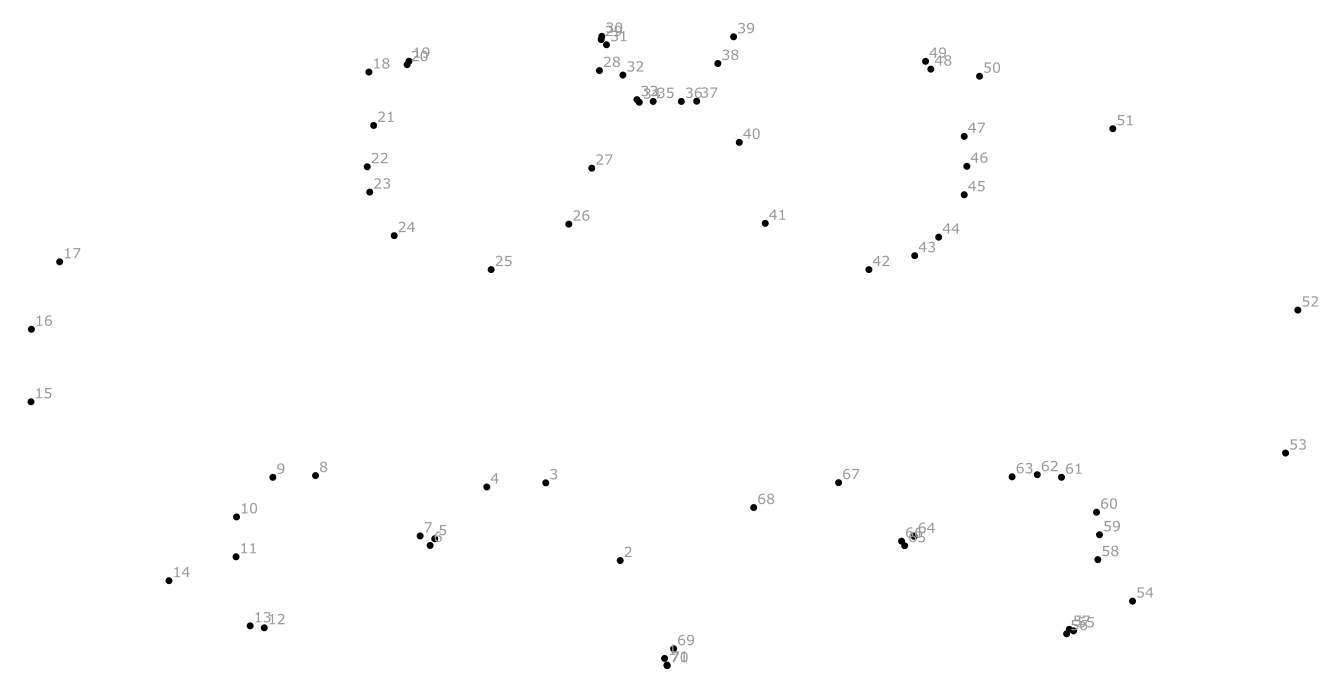
Shape/path node numbers
To undo the node numbering, select "Edit" and "Undo".
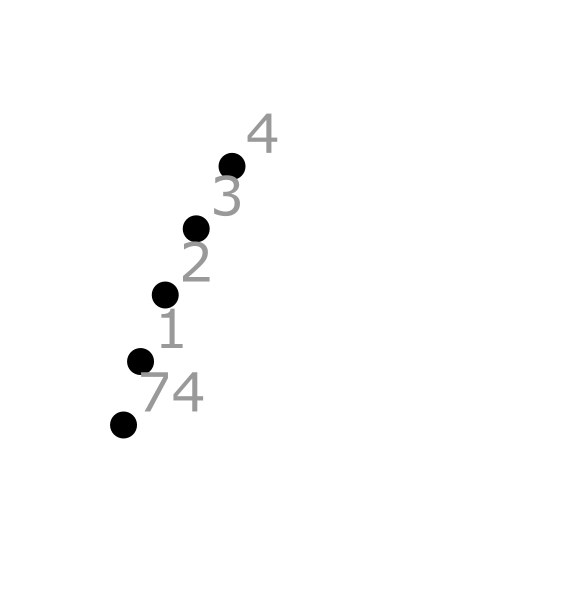
The initial node numbering and path/shape direction is most likely random.
The node numbering and direction is important for the eventual physical cutting of a shape on a machine. My hotwire cutter physically starts in the lower left corner of the picture above. Imagine a node 0 at the lower left corner. The styrofoam is physically held on the top edge of this picture. So if node 1 were on batmans head (see picture below), then my machine would cut a starting line from the lower left corner to batmans head, pretty much ruining the piece by cutting it in half at the start. Therefore I make sure that node 1 is somewhere in the lower left corner, so my machine can reach it, without having to cut across any of the shape I am trying to create.
Another real world issue is how the foam is being held for cutting. My machine holds the foam along the top edge. So it is not good to cut along the top edge first, because if you do, the foam piece is not well supported for the rest of the cut. So I have the starting node and direction setup to cut along the bottom first and finish at the upper left.
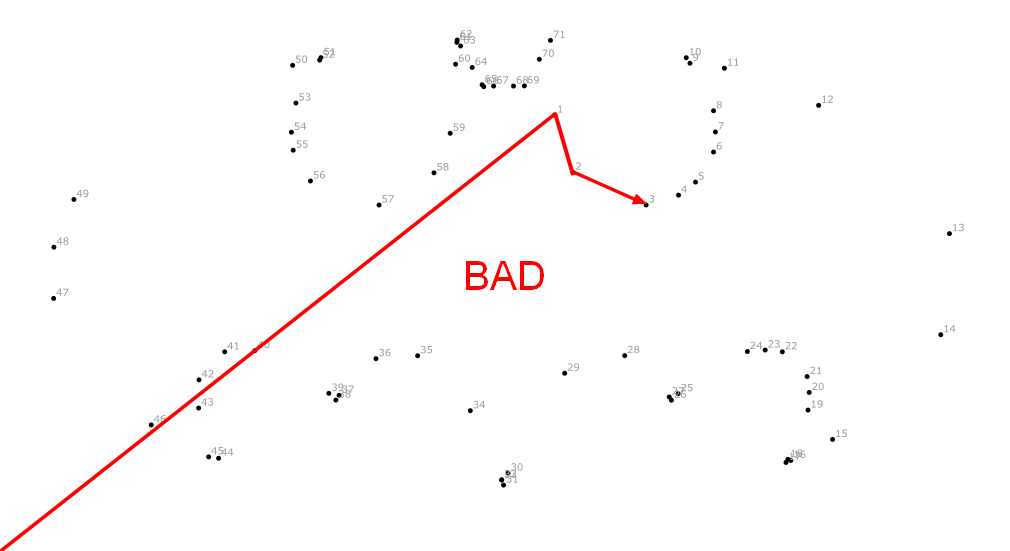
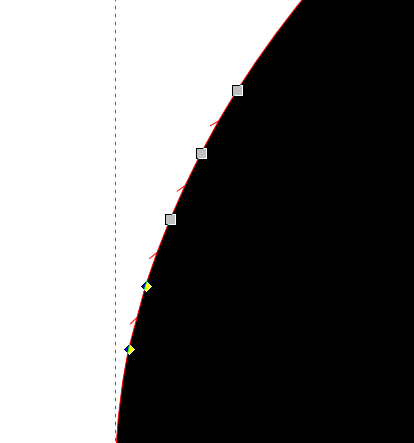
Here is how I would want to setup the batman shape/path for cutting on my hotwire machine
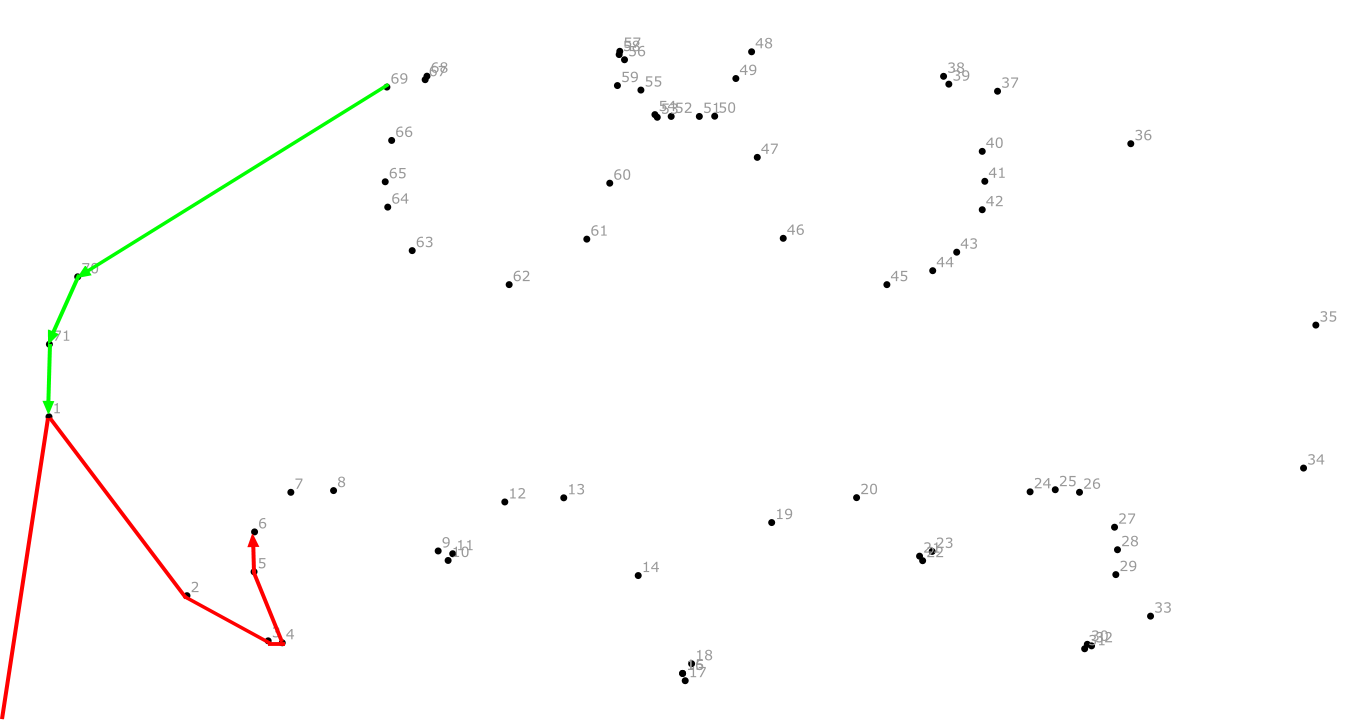
Hotwire cutting path
So how does one reorder the numbers and change the path/shape direction?
Well changing the path/shape direction is easy. Its in the menu under "Path" and "Reverse"
Selecting which node is number one is difficult. Hopefully this function gets added to inkscape in the future. I did find a method to set the first node. You have to delete a path segment (alt backspace). This deletes the line, but not the nodes. Then join selected nodes with (alt j) command. This will renumber the nodes, with node one where you made the break. Unfortunately, when the nodes are reconnected, they are connected with a straight line. This can mess up your design.
So picture on the left, is the segment, on batman logo, that I want to use for node 1. I have selected the segment. The picture on the right shows the results of the (alt backspace) and (alt j). Notice the line is now straight. This won't look good when we fabricate the design.
Segment selected to be node 1
|
Look bad, as segment is straightened
|
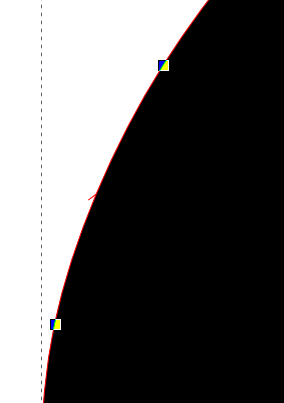
Either select a "straight" line segment for doing this, or add some nodes, so that the area you want becomes nearly a straight line. Below I added a few nodes to the area that I want to be node 1. The more nodes you add, the straighter the line is between nodes. Now on the right picture below, I have successfully renumbered the nodes and you cannot tell, since the lines are nearly straight to begin with.
Added additional nodes
|
Renumbered using two close nodes
|
Node 1 has been moved
|
To be continued...
