Creality CV-01 laser engraver / cutter
Saw this Creality laser engraver / cutter and it appeared to be very similar to the hot wire foam cutter that I had home built. Similar in that it would operate in only 2 dimensions. The laser would have an advantage in that it could be turned on and off, almost a 3rd dimension, allowing you to cut shapes without making the cut a single continuous cut like the hot wire cutter is limited to. The laser could also engrave, a function that cannot be done with a wire cutter.
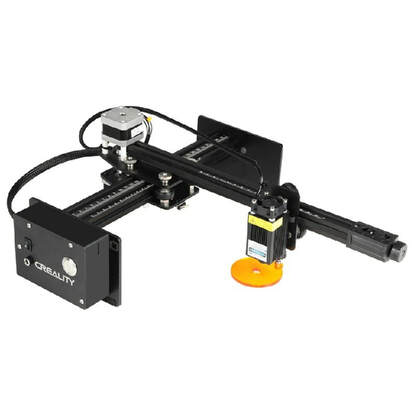
Creality CV-01 laser cutter/engraver
Set-up
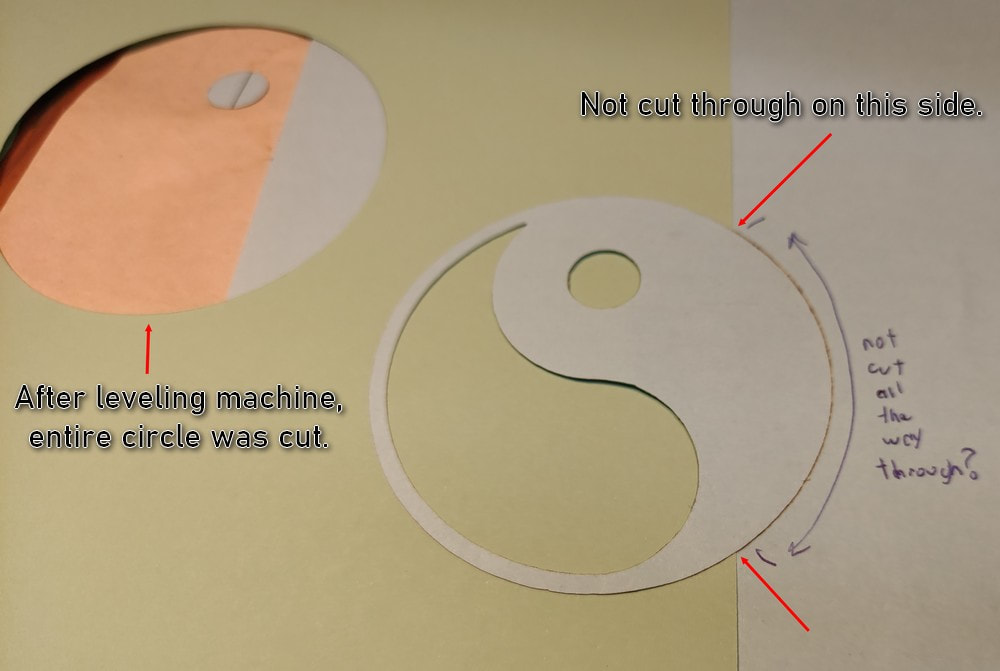
The physical machine set-up is rather easy. You just bolt one axis onto the other with 4 thumb screws and connect up two wire connectors. There is a trick that is not mentioned in the set-up instructions. That is to make sure the machine is level. My machine was not very level from the factory. So when I went to cut a circle, about 25% of one side would not cut. The reason being that with the machine not being level, the laser was closer to the item being cut on one side then on the other and hence out of focus on that side. The out of focus caused a loss of cutting power, which prevented the laser from properly cutting through the material.
See picture below, as I was attempting to cut a yin-yang symbol on a piece of paper. The right side of the yin-yang symbol only burned the paper enough to leave a black line, but not enough to cut all the way through the paper. Later, after properly leveling the machine, the green piece of paper has a complete circle cut out. If you have a bubble level, I recommend checking your machines leveling before you start.
Maybe Creality should throw in a bubble level with the unit and some steps to level the machine during set-up?
Uneven laser power causing cutting problems
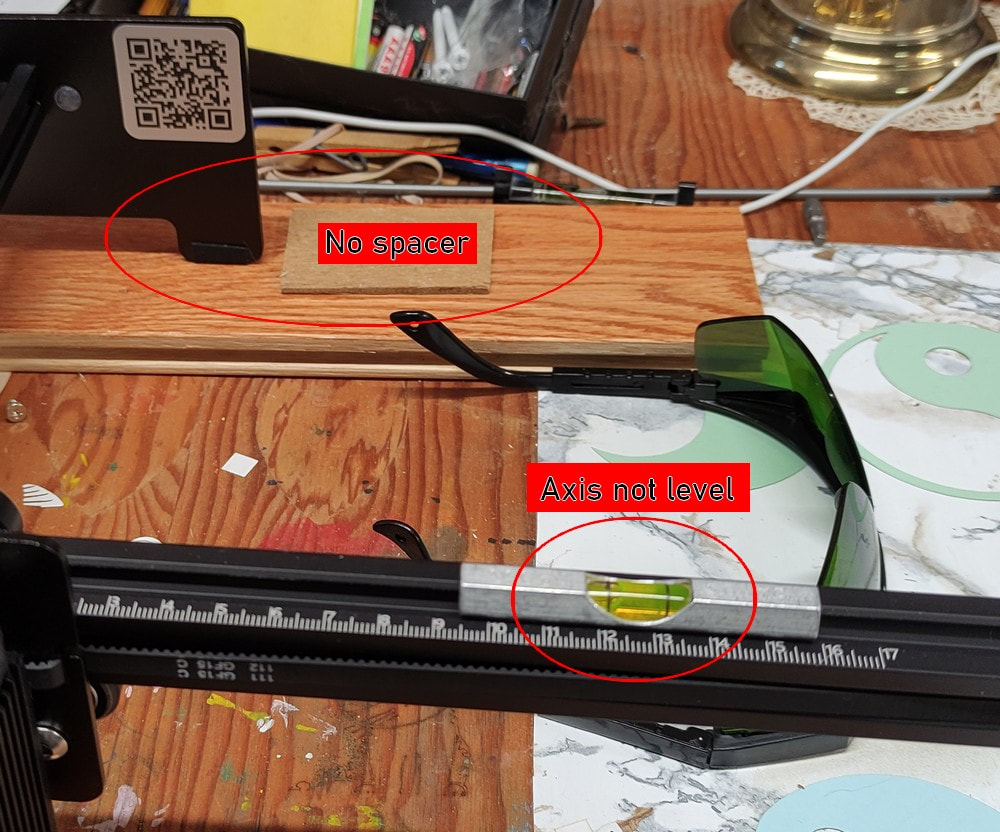
Leveling my particular machine required roughly 3mm spacers to be placed under 2 of the machines feet. The picture below is the leveling out of the box from the factory. The machine was level on the one of its axes, but not on the second axis. The bubble on the bubble level tool (resting on the laser arm) is way off to the left side in the photo.
CV-01 not very level out of the box
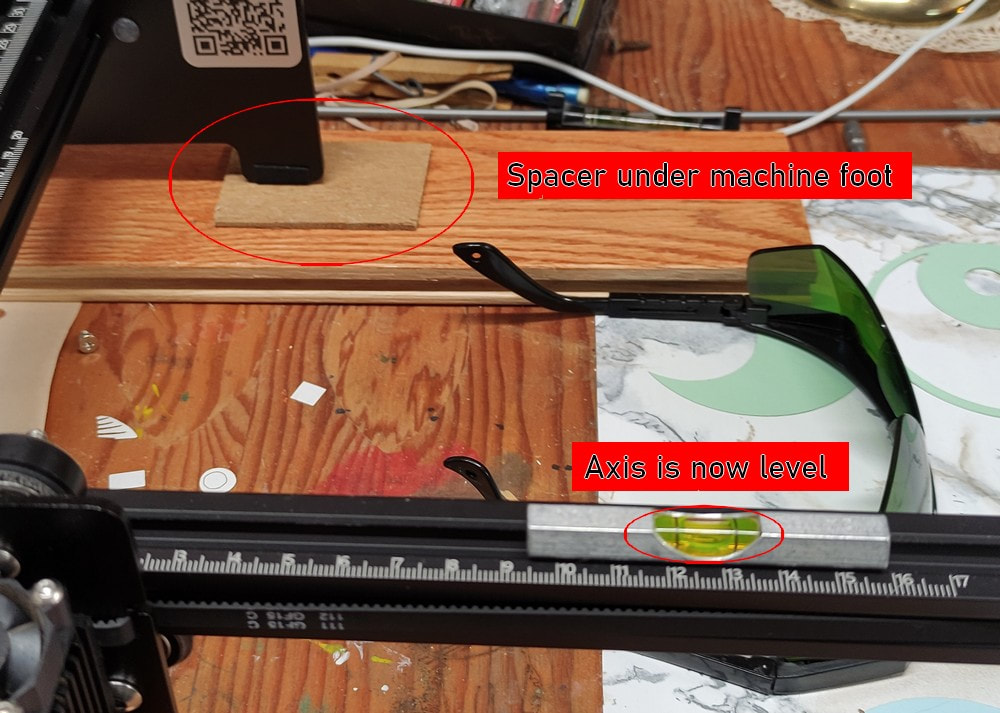
After I added approximately 3mm spacers under two of the machines four feet. I achieved a good leveling of the machine. It may be possible to make the machine naturally level (without the use of external spacers), but I believe one side of the adjustment is underneath the electronic circuit board and I have not yet attempted to fix it.
CV-01 fixed leveling with spacers
Creality Laser Engraver Software
The software comes with the machine on a USB thumb drive. The version I received was V1.0.1. The software must be run in administrator mode. You have to right click the program and specifically "run as administrator". This is a little annoying.
Creality Laser Engraver/Cutter V1.0.1 Software problems / Issues
I found a picture of a lucky cat that I wanted to engrave. The engraved grayscale GCODE output from the Creality desktop software added a faint line of dots on one side of the image. I went back and examined the source image, but could not find any image dots in the area that the Creality software thinks there are. I believe this is a bug in the Creality software. Hopefully an update or patch is in the works.
Here is the JPG image of the lucky cat that I engraved:
Here is the JPG image of the lucky cat that I engraved:

Lucky Cat image
Here is the "output" of the Creality software. Looks good and I don't see no line of dots on the right side.
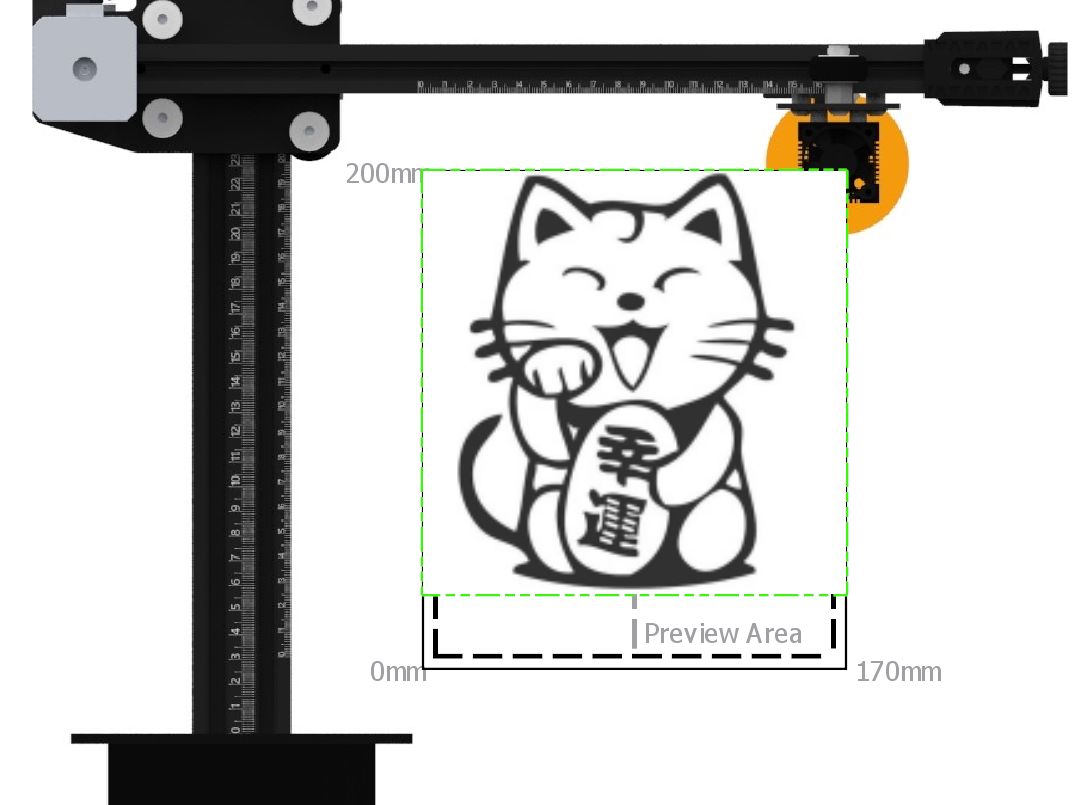
CV-01 showing lucky cat image
Here is the results of the engraving. On the whole I am very pleased with how it came out. I don't understand the line of faint laser dots on the right side. These dots mess up an otherwise perfect engraving. The extra dots also cause the image to take longer to engrave than needed with the extra machine motion.
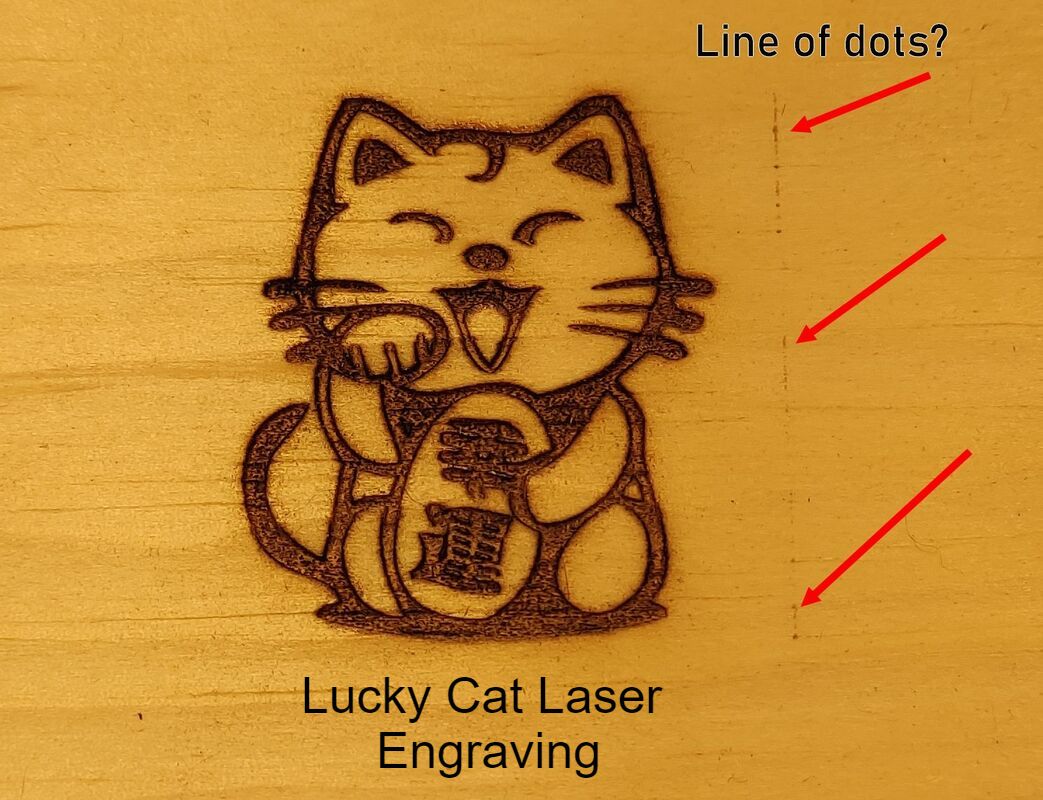
Lucky cat engraving with extra dots
To confirm the line of dots, I read through some of the GCODE output and the line of dots are in the GCODE output file. So its not an issue with the laser controller. I found a website that decodes and draws GCODE files. Its ncviewer.com. I uploaded the lucky cat GCODE and got the following output (see picture below). The decoded output clearly shows the extra motion and the line of dots on the right side of the image.
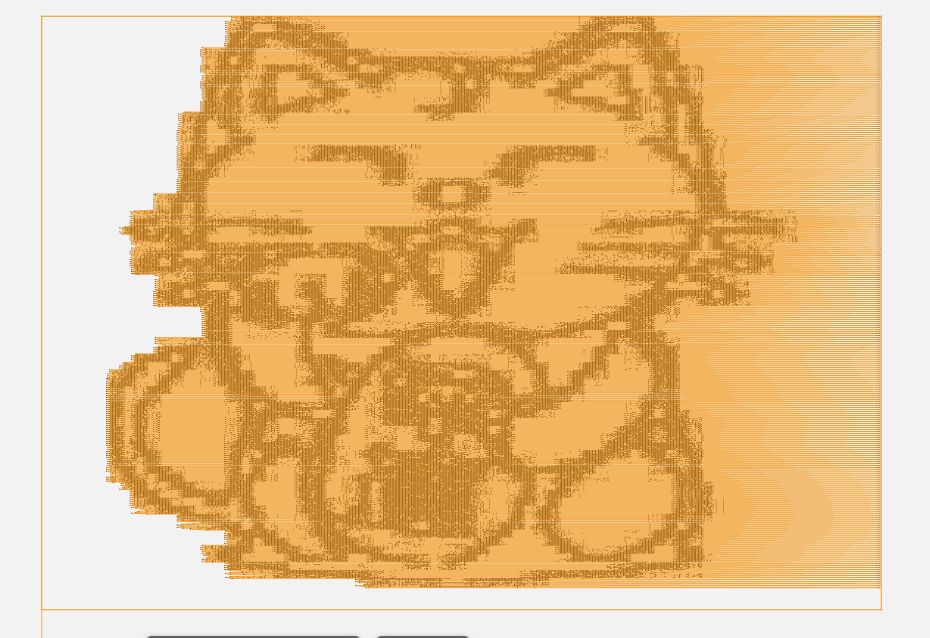
ncviewer website showing extra dots in GCODE file
This problem does not happen on all images. Below is an example of an image of Kokopelli that worked just fine.

Kokopelli image
Here is Kokopelli from ncviewer. No extra dots as far as I can tell. No wasted machine motion.
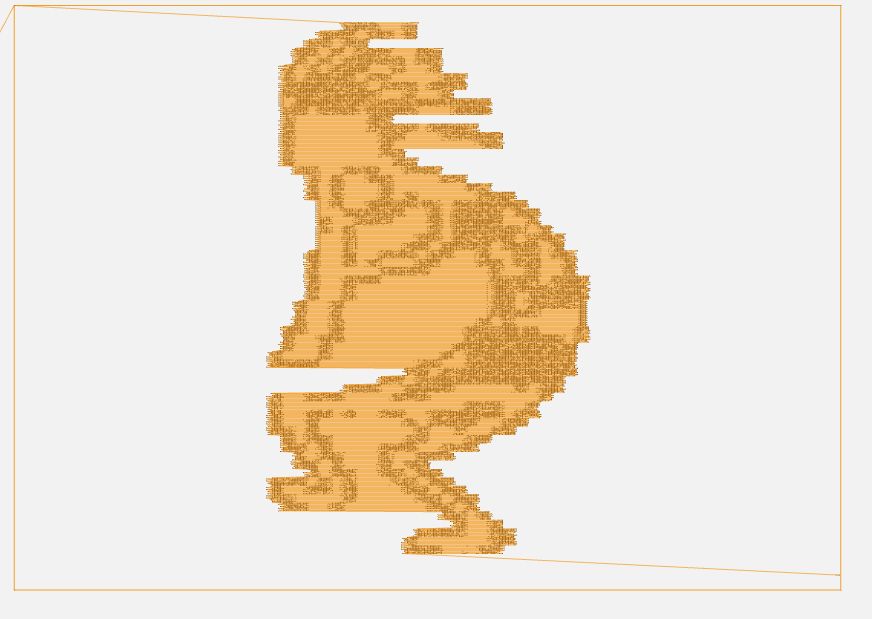
Kokopelli image from ncviewer showing no extra dots
GCODE
GCODE as used by the Creality CV-01
G0 x y = Rapid move. It moves the machine to the given coordinates, with the expectation that no lasering takes place during the move.
G1 x100.4 y96.6 z0.000 = The G1 command tells your printer to laser in a straight line to the location that you specify. You can use this to move just a single axis, or multiple axes at once. G1 commands are the majority of the commands.
G28 x0 y0 or G28 = Just stating G28; with no axis or axis set to zero would return all axis to the home position in a linear rapid move.
M106 Sxxx = Turn on laser with the power level xxx. xxx=1 to 255. Where 255 = 100% (1.6W) while 128 = 50% (0.8W). When the creality is showing the area outline box before burning, it uses an M106 S5 command for the laser power. This is a power level of 2% (5/255), which equals 0.032W.
M107 = Laser Off
Fxxxx = Feed rate, or how fast to move the laser head across the material. The faster the laser head moves, the less time the laser dot spends at any individual point on the item being cut/engraved. This can result is faster cuts, but will require more power. Since this laser is not very powerful, cutting will almost always need to be done at a lower speed.
F1800 = 100% speed
F900 = 50% speed
etc...
F4600 is the speed used for the outline for you to center the cutting material. So the machine can move a lot faster than the the F1800 that is generated by the software for the fastest cutting speed. Since the laser is not very powerful, I doubt you would ever need any speed faster for cutting/engraving.
I did a quick test cutting some paper.
Power / Speed combinations = results:
30/30 = Just drew a black line on the paper, no cutting
40/30 = Cut 3 sides of a square, 4th side still well attached
50/30 = Cut square, but square was still slightly attached, needed to pull a little to break it out
60/30 = Cut square, square fell out on its own
70/30 = Cut square, square fell out on its own
70/40 = Cut square, but square was still slightly attached, needed to pull a little to break it out (like 50/30)
80/40 = Cut square, square fell out on its own
90/40 = Cut square, square fell out on its own
If you are going to cut intricate paper shapes, you need to cut to "fall out", else you are going to have problems with breaking the intricate paper cut as you try and pull on the cuts that are sticking.
Smoke and fire, why you need a ventilation hood
This is a laser cutter/engraver. So it does its job by burning the material. This causes smoke. I don't worry to much when lasering wood. You may even like the smell of the burned wood. I do worry when lasering masking tape, I was making stencils, and/or plastic. You don't know what is in the glue used on the tape and plastic is just nasty.
My workshop is in the basement, which has a small casement window. I built a vent system to exhaust the laser cutter smoke out through this window. My vent system consisted of a large card board box, from Costco. The cheapest bathroom exhaust fan that I could find and a short section of dryer vent pipe from a home improvement store. I taped the two together using blue painters tape.
My workshop is in the basement, which has a small casement window. I built a vent system to exhaust the laser cutter smoke out through this window. My vent system consisted of a large card board box, from Costco. The cheapest bathroom exhaust fan that I could find and a short section of dryer vent pipe from a home improvement store. I taped the two together using blue painters tape.
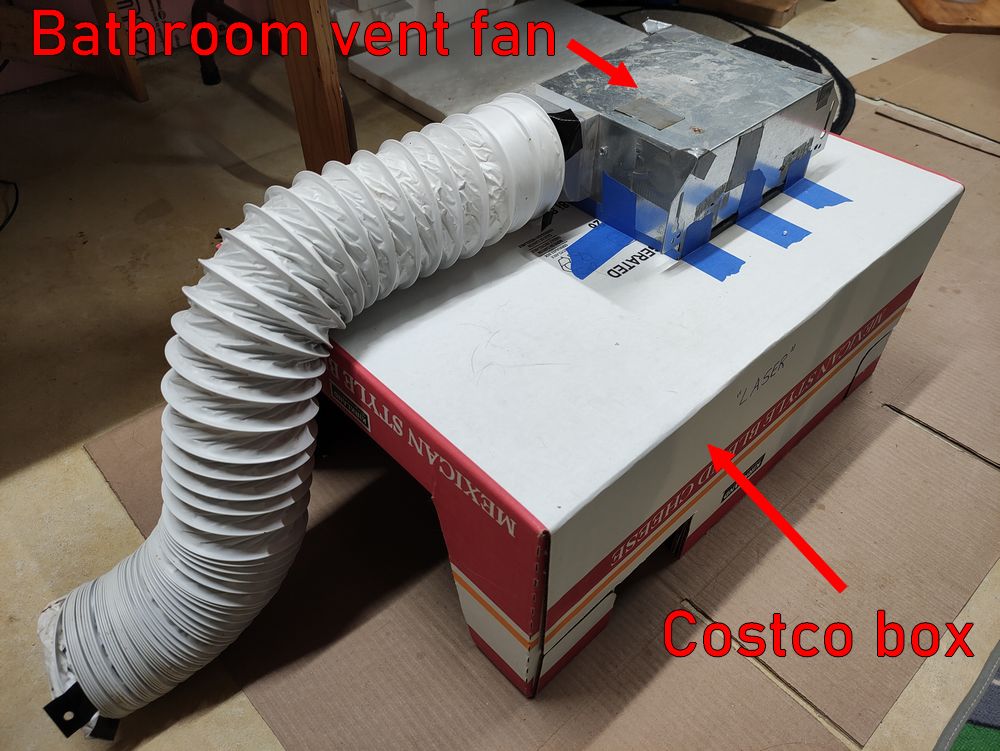
Cheap laser cutter cover / vent hood
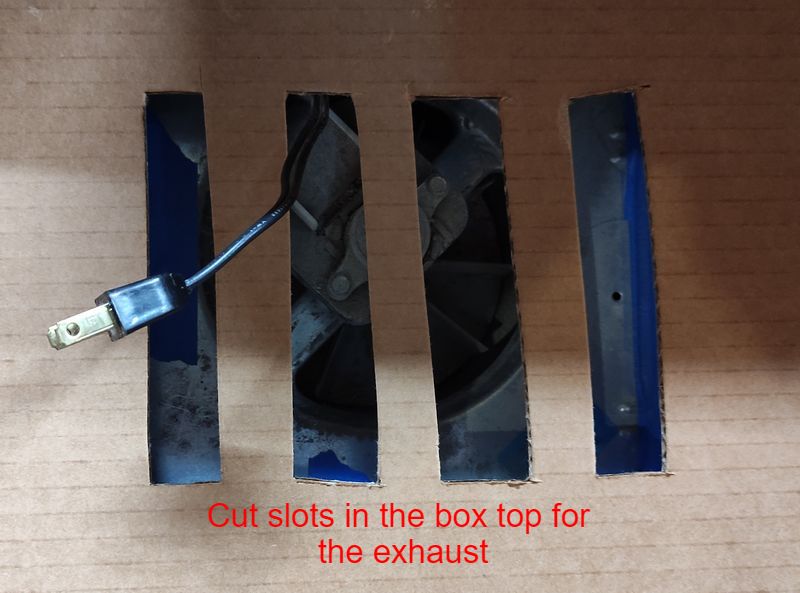
Using a large cardboard paper tube (like what posters are kept in) and a cardboard/foam poster board (from your school projects), I built an insert that sits in the open casement window and provides the venting of the smoke and fumes to outside.
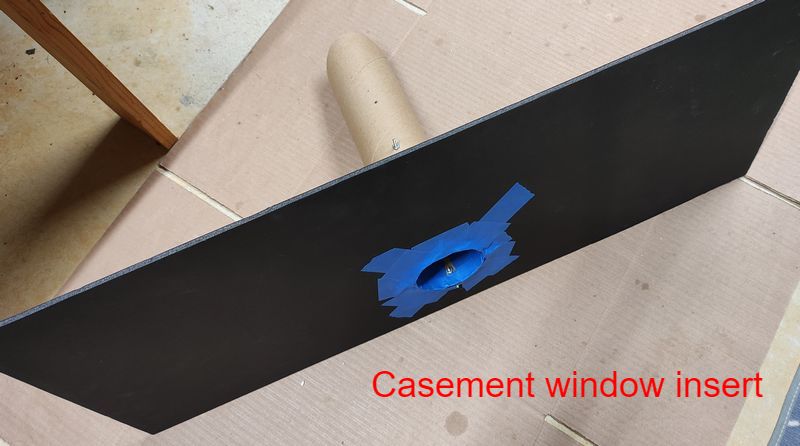
The box is also nice because it blocks the laser from your eyes. Engraving takes some time and you don't want to wear the protective glasses for that long period of time, or be forced to leave the room, so a box to block the light is an added bonus even when burning wood and not using the exhaust fan.
Cutting shapes with a border
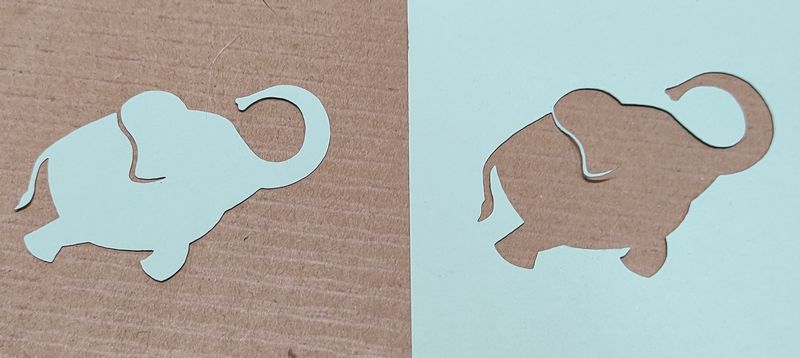
When using the creality software if you want to just cut an outline and the image is black with a white background the machine will just cut the shape out. For example, cutting a flower silhouette in a piece of paper would create a hole in the paper that is the shape of the flower. So you get the flower cut out and a piece of paper with a negative image of the flower. This may be useful if you wanted to use the negative image as a pattern to paint a flower on another object. If you use a white image and a black background, then the machine will cut out the shape, but also cut a outer box defined by the black background. You get the same pieces as a before, but the raw material is trimmed by the size of the black part of the picture.
A picture is worth a 1000 words. Here are the source images to outline cut.
On the left the the typical black on white, on the right I draw an oval shape around the image.
On the left the the typical black on white, on the right I draw an oval shape around the image.
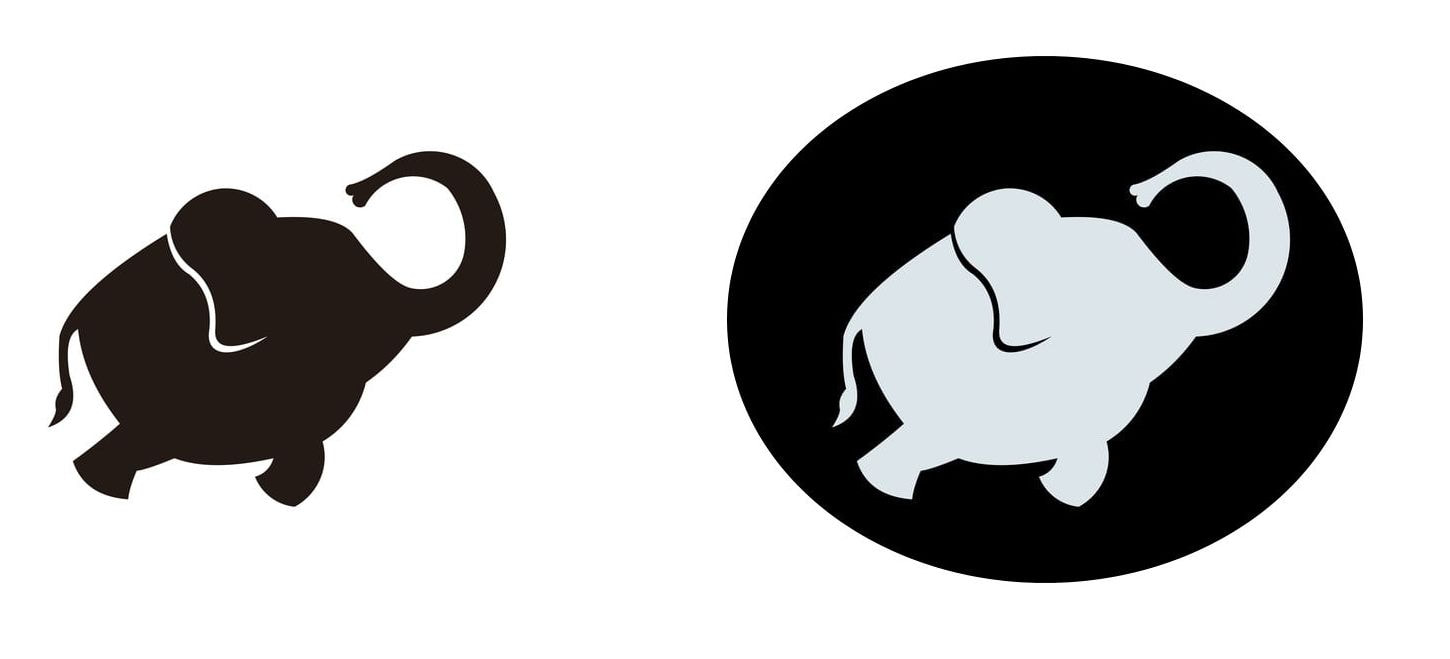
Example of white vs black images when cutting
The black on white image (the elephant on the left) cuts a single elephant out of the paper.
white image laser cut
The white image with a black background (the elephant on the right side) cuts both the elephant and the black oval shape.
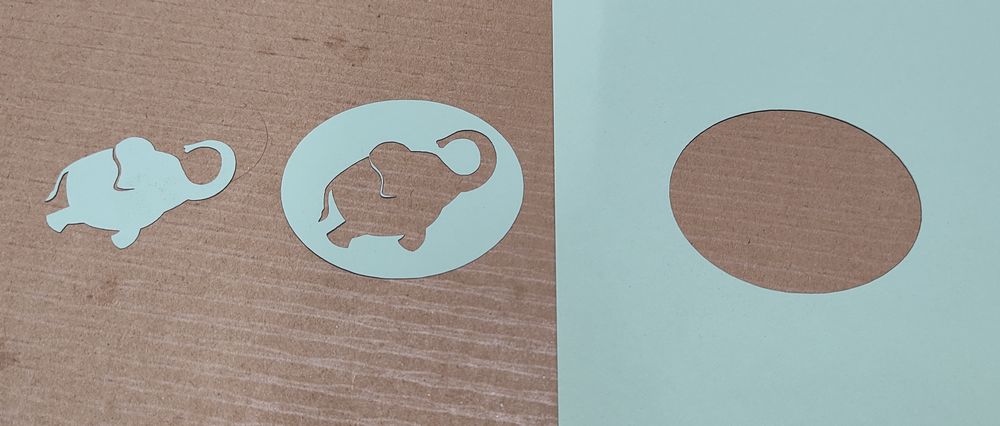
black image laser cut
How thick of a material can you cut with the CV-01
So this is a question that I had before buying the Creality CV-01. So I did some testing to see just what I could cut with this low cost laser cutter. Starting with a regular sheet of paper. The paper measures 0.09mm thick. Paper cuts in one pass nicely with a setting of 60% power and 30% speed.
Second I tried some card stock. Its similar to an index card. The paper was 0.23mm thick. I was able to cut through it in one pass with 100% power and 15% speed.
Third I tried some of the common manila folders. The manila folder was 0.27mm thick. I was able to cut through is a single pass with 100% power and 5% speed.
Fourth I tried thin piece of dense card board. The type that groceries are typically come packaged in. The cardboard measured 0.71mm thick. I was not able to get a one pass cut. So I tried using 2 and 3 cutting passes. I used 100% power and both 10% and 5% speed for the multi-pass test cases. At two passes, 10% speed, the square was not cut out. At two passes and 5% speed, I had cut through to paper label that is glued on one side. It possible that without the paper label, it may have cut all the way through. With three passes, it cut all the way through. There was a bit of burning and/or smoke stains near the cut on the 2 and 3 pass runs. (see picture below for burn/smoke marks). The smoke/burn marks were not very consistent. The Creality software also does not have a way to generate a GCODE file with multiple passes. The easiest way to get a second pass is to press the start button a second time, without moving the item being cut to just run the same cut a second time.
I did not really expect this lower powered hobby laser to cut thick materials. I would say one pass cutting is nicer as it leaves much less burning of the surrounding material. So as long as you expect to only cut paper or thin card stock this laser cutter works just fine. If you want to cut thicker material, you will have to spend more money and buy a more powerful laser.

Creality CV-01 smoke & burn marks when doing multiple pass laser cuts
Balsa Wood
Cut some balsa wood as a test. I had some 1.65mm(.065in) balsa wood. I tried at 100% power and 30% speed. That did not work, its the star on the left side of the picture below. I then tried again at 100% power and 10% speed. That worked. I was able to use the Creality CV-01 to laser cut the star out of the balsa wood sheet in a single pass.
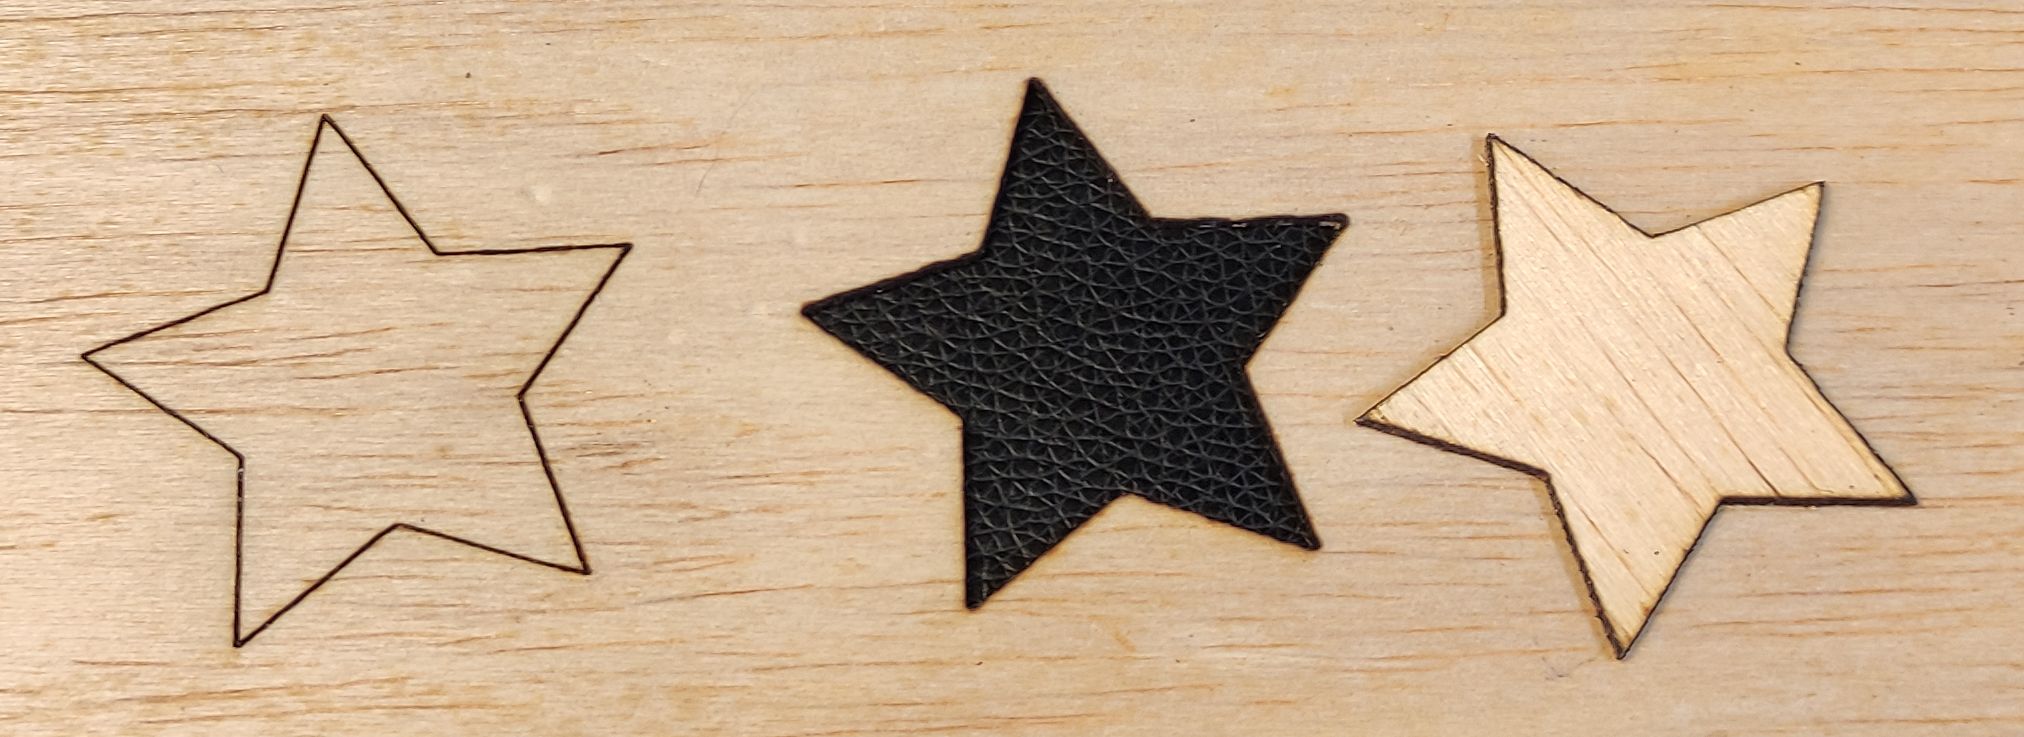
Creality CV-01 Laser Cutting Balsa Wood
Tried cutting a more detailed shape in balsa wood using the Creality CV-01. I did a seahorse. The seahorse did cut through at 100%, 10% speed, but was still slightly attached in several spots. I suppose a touch lower speed may correct this.
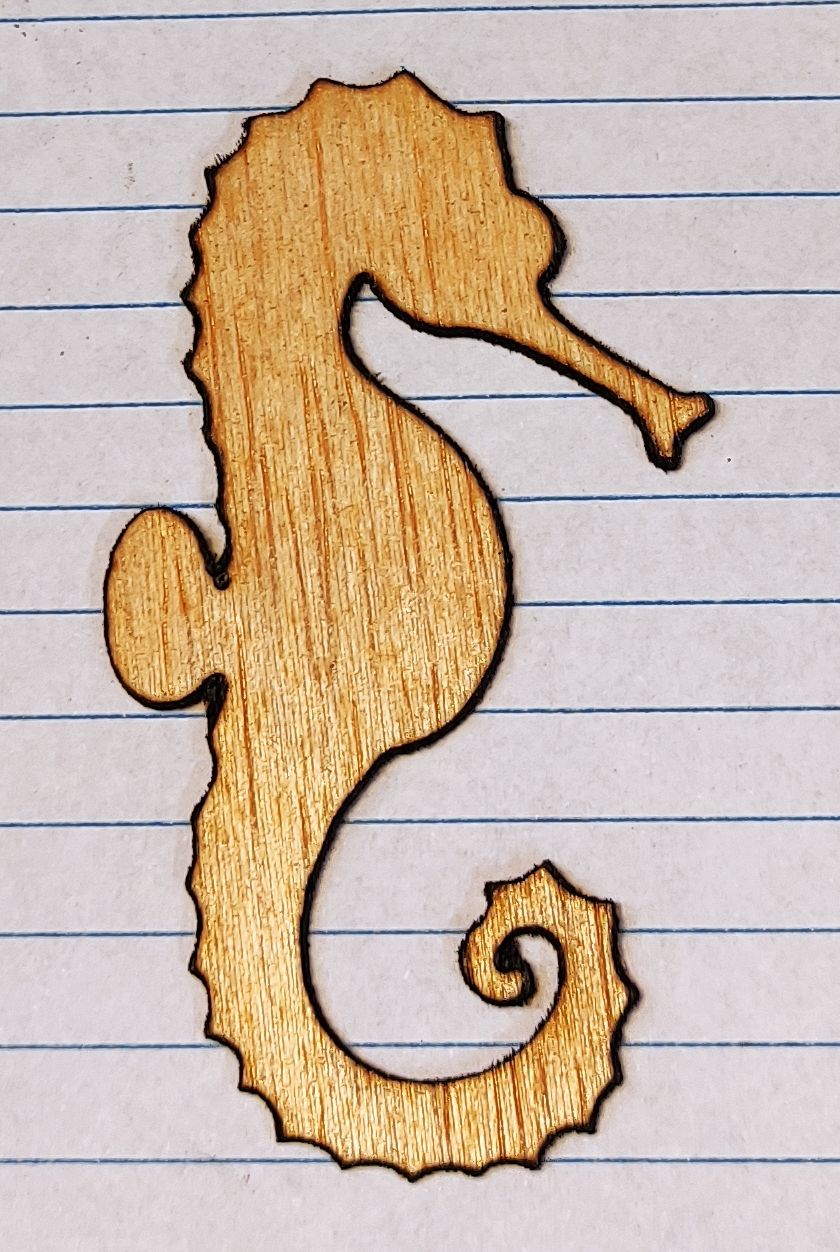
Creality CV-01 laser cutting balsawood seahorse
